

How To Install And Configure Pfsense In A Virtualbox Step By Step Youtube
This tutorial explains how to install and configure the Pfsense system.
pfSense is a firewall and router software you can install on a computer to create and manage your own router or firewall. It tin can exist used from the command line or from a web graphical interface. This tutorial covers pfSense installation and basic configuration tips.
Installing Pfsense
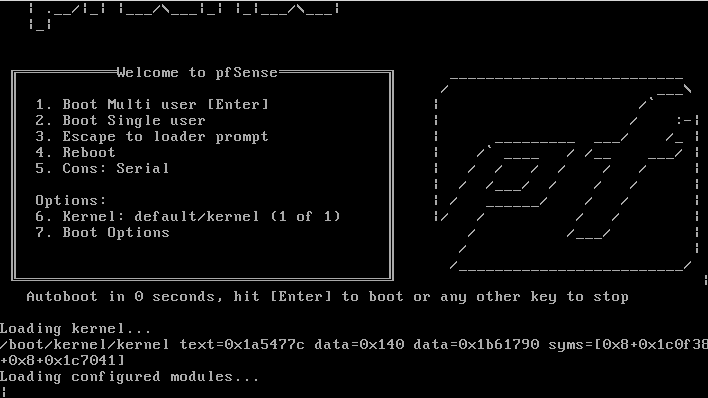
To begin with Pfsense installation, insert the deejay or USB drive containing the bootable Pfsense ISO paradigm to kicking. In the screenshot beneath y'all tin can see the first installation screen you'll encounter. Y'all don't need to select an option, the installation process volition kickoff automatically.
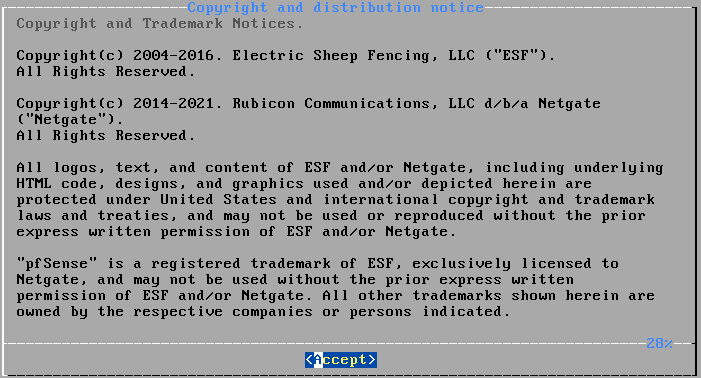
The second screen contains a Copyright and distribution find you lot need to accept past pressing the ACCEPT push, as shown below.
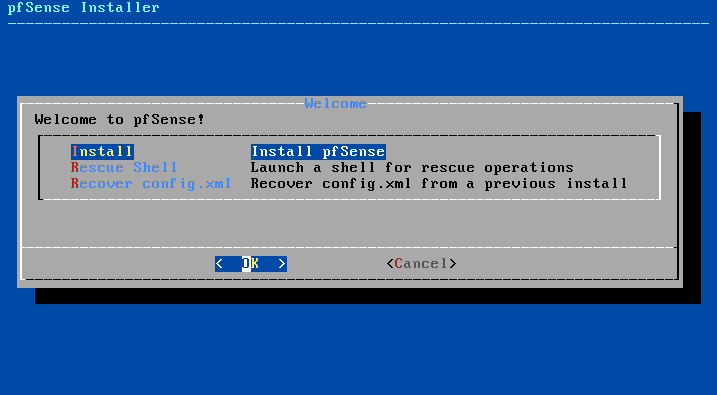
You lot can outset a fresh Pfsense installation, launch a recovery console or restore a configuration file. To begin a new Pfsense installation, press the ENTER central on the Install option.
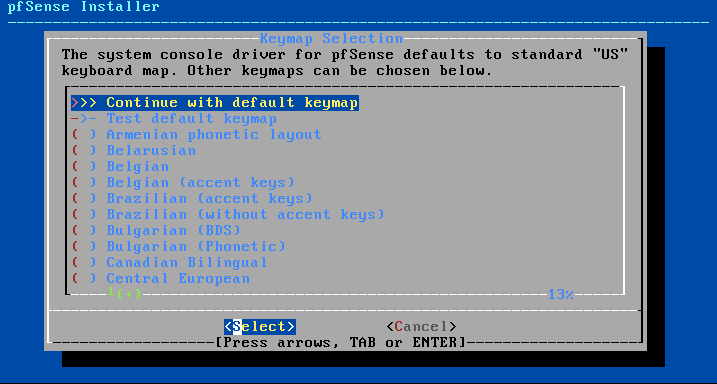
At present, you can select your keymap. For US English, press ENTER to choose the default option.
Recent Pfsense versions allow yous to select ZFS as a filesystem. ZFS has many features including Inline Data Pinch, Inline Data deduplication, ZFS Ship/Receive, RAID Z and more. In this tutorial, we will select the ZFS pick, merely Motorcar UFS will work correctly if selected. Select the option you lot want and press ENTER to continue.

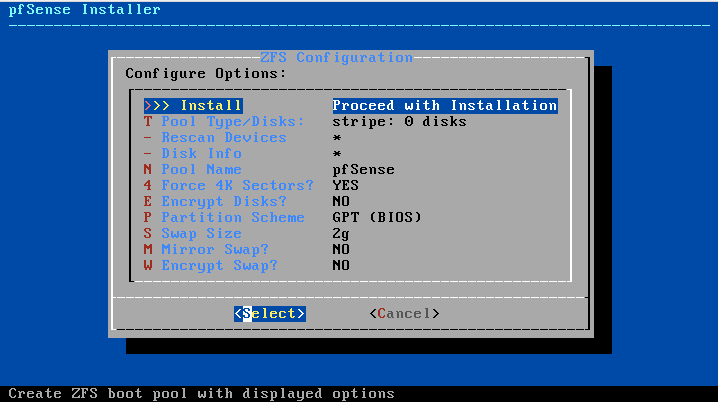
After selecting your filesystem, the installation process volition allow you to edit some configuration and select additional options such as disk encryption, Swap size, etc. as shown in the image below. Yous can check the options, or yous can proceed with the installation by pressing Install as shown in the following screenshot.
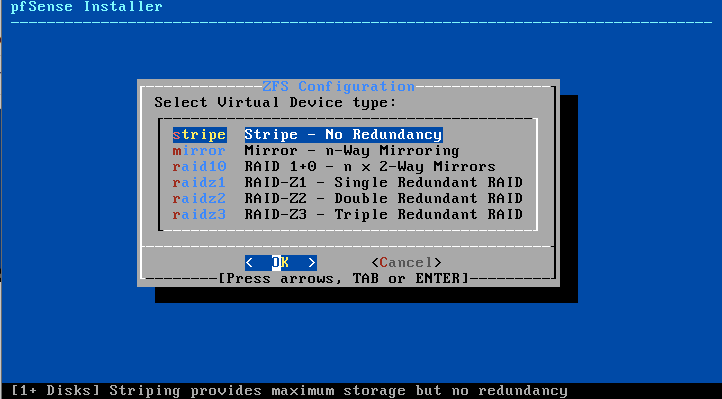
Now, y'all need to select the disk configuration. The available options include:
- Stripe: With this configuration, Pfsense will piece of work as with a unmarried disk, even if you lot add multiple disks (RAID 0).
- Mirror: By choosing this configuration, Pfsense will mirror all content to other disk/southward.
- RAID10: This option combines stripes and mirrors. This is the best choice if you lot want to be able to add additional space while mirroring the content.
- RAIDZ1: This pick will implement a single RAID.
- RAIDZ2: This option is used to implement double redundancy.
- RAIDZ3: This option is used to implement triple redundancy.
In this tutorial, I selected the stripe (no redundancy) selection, equally shown below. Select your choice and press ENTER.
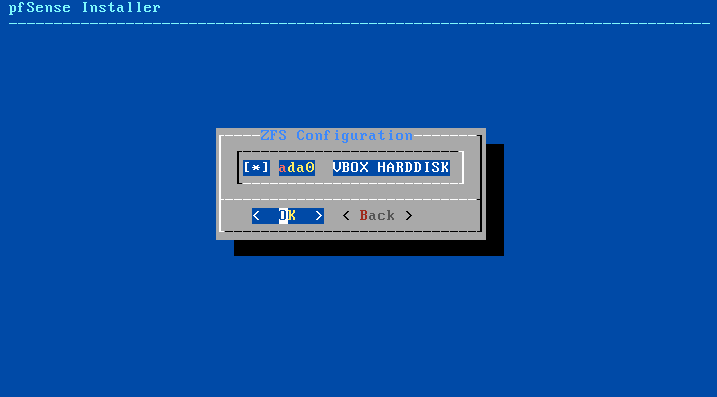
You need to select the disk on which Pfsense volition exist installed. In my case, I'chiliad using Virtualbox for this tutorial. Select the disk unit you want and press ENTER.
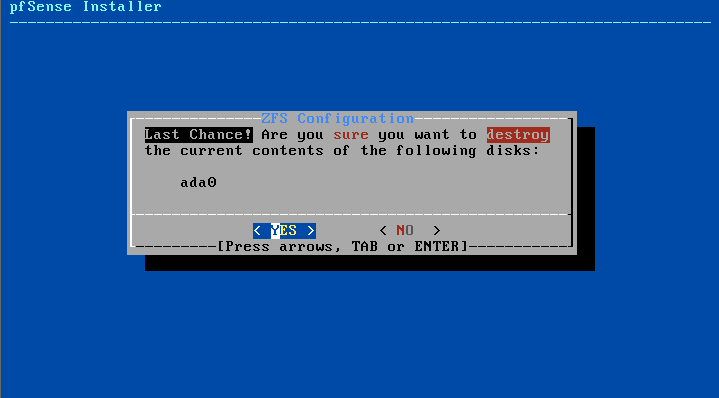
Before starting the installation process, the installer will give y'all a last risk to end or edit the installation. If you have zippo to alter, printing ENTER to beginning Pfsense installation.
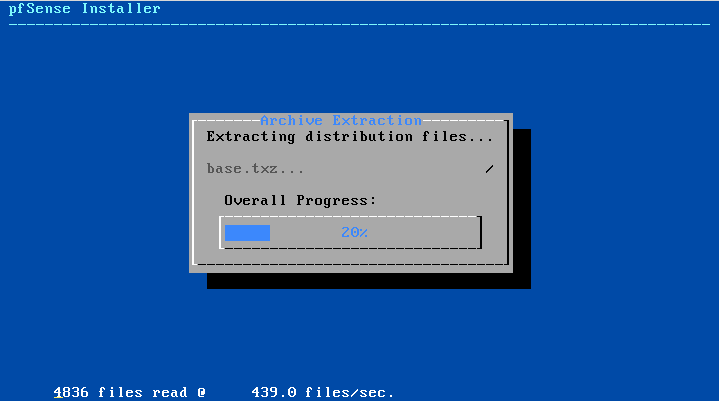
Every bit you can see in the screenshot below, the installation process will starting time. This may accept a few minutes to finish.
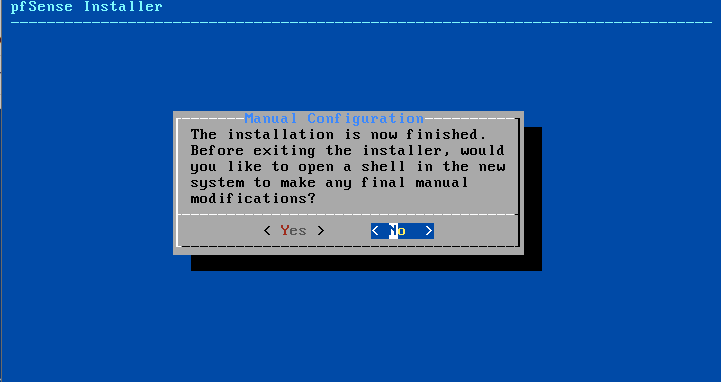
Once the installation process ends, you will be offered to make changes. If you have no changes to do, press No to go along.
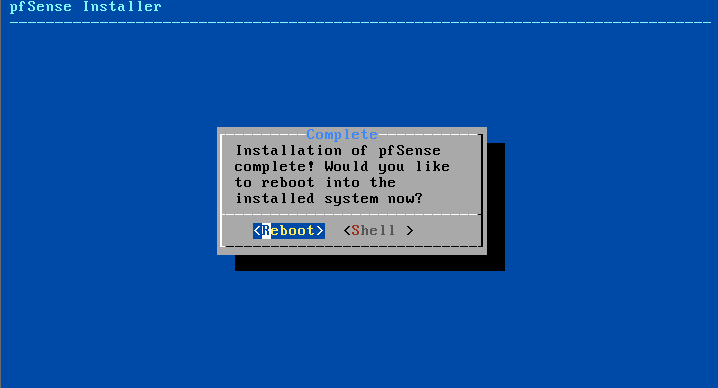
Finally, you will be asked to reboot into Pfsense. Select and press Reboot to continue to start Pfsense.
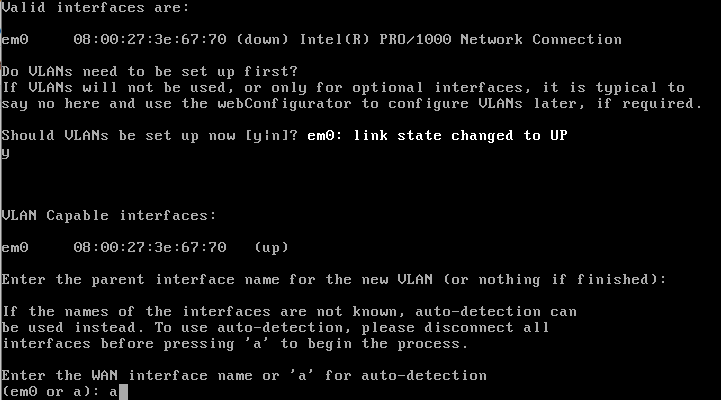
On the first reboot, Pfsense will offer you to set upward the network/s interface/southward. The get-go interface is virtual. The virtual network interface is em0. To configure the network interface up, printing Y. You can select Northward and configure it later on through the Web configurator every bit shown in the screenshot below.
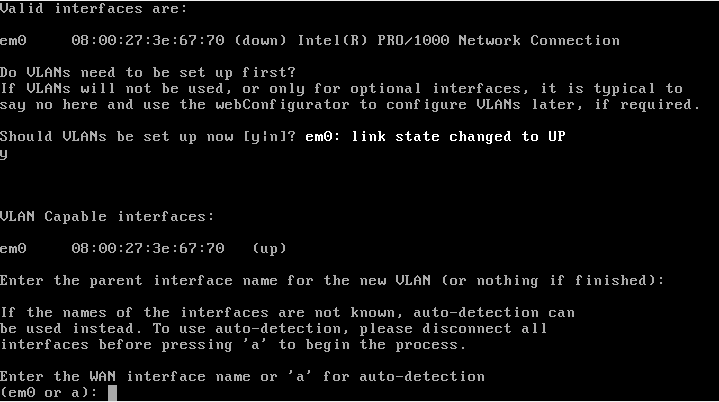
At present, you need to select the WAN interface, you lot tin can type it or select 'a' for autodetection.
And so you lot'll be asked to select the LAN interface. In my case, it fails because information technology's unplugged. Like in the previous step, you can type your LAN interface proper noun or select 'a' for autodetection.
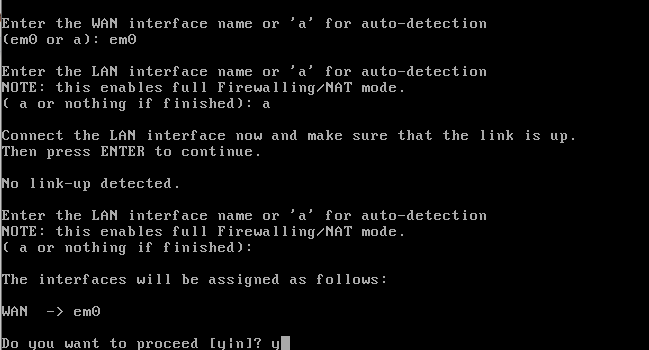
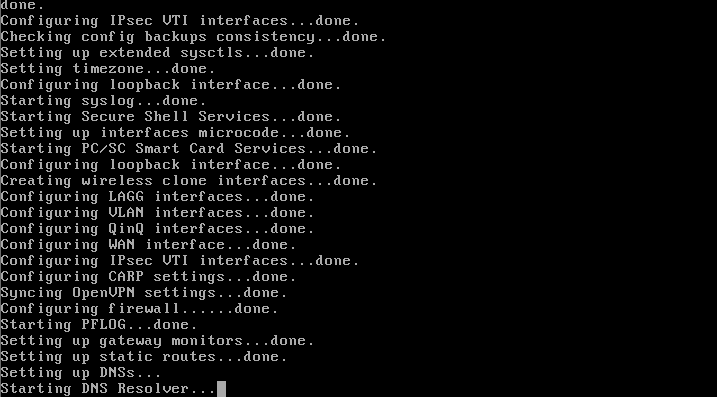
If the autodetection was correct, printing 'y' to set up your LAN interface. Then Pfsense will boot as shown in the post-obit screenshot.
The Pfsense panel allows you to execute configuration tasks,, as shown in the paradigm beneath. The bachelor options are:
- Logout (ssh just):
- Assign Interfaces: This option allows you to reconfigure your network interface(southward).
- Set interface (southward) IP address: From this option you lot can ascertain IP addresses for your network interfaces. It's likewise useful to enable, disable and configure the DHCP service, to access the GUI through HTTP (Instead of HTTPS) and to disable the lockout rule if the user has been locked.
- Reset webConfigurator password: Here you can reset the system user and password to default values (admin/pfsense). The script also tin can enable or generate the default account again, in case it was disabled or removed.
- Reset to factory defaults: Use this pick to restore the default arrangement configuration, including the removal of added software.
- Reboot system: This selection offers different options to carry out a organization reboot.
- Halt system: Utilize this option to shut down the organisation.
- Ping host: This option simply allows you to execute ping for testing purposes.
- pfTop: pfTop displays the organisation country and transferred information. It is useful to monitor the system and diagnose problems.
- Filter Logs: From this option you tin can check the firewall logs.
- Restart webConfigurator: This option allows you to restart processes linked to the web GUI such as nginx.
- PHP Beat + pfSense tools: This pick allows you lot to execute PHP code. This selection is useful for developers and users familiarized with PHP.
- Update from console: This option is useful to upgrade your system to its last version.
- Enable Secure Trounce (sshd): Here yous can enable or disable the SSH service.
- Restore recent configuration: This pick allows yous to select between concluding system configurations for restoration.
- Restart PHP-FPM: Restart the PHP service, useful to afford some webConfigurator problems.
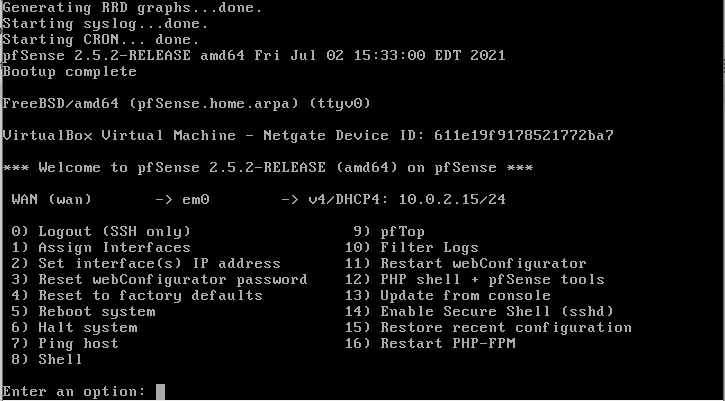
All the previous options are also available through the GUI, which you can access from your browser using the IP address assigned to your pfSense organisation. In my case, as shown in the previous screenshot, the IP address is 10.0.2.xv.
Conclusion
Equally y'all can see, installing and configuring pfSense isn't a hard task even though pfSense is based on FreeBSD rather than Linux. Installing pfSense would exist an interesting introduction to FreeBSD installation. The configuration menu makes like shooting fish in a barrel tasks to ameliorate, configure, and prepare problems. PfSense is a great option to implement a fast and independent firewall device, since every bit you could confirm past post-obit the previous instructions, it takes minutes to exist installed and configured. This tutorial does not cover the webConfigurator considering of its simplicity, it is pretty intuitive and any Linux level user can deal with it.
Thank yous for reading this tutorial explaining Pfsense installation and basic configuration. Go along following us for boosted Linux tutorials and tips.
About the author
![]()
David Adams is a System Admin and writer that is focused on open source technologies, security software, and figurer systems.
Source: https://linuxhint.com/pfsense-configuration/
Posted by: musgroveansenuter.blogspot.com
0 Response to "How To Install And Configure Pfsense In A Virtualbox Step By Step Youtube"
Post a Comment